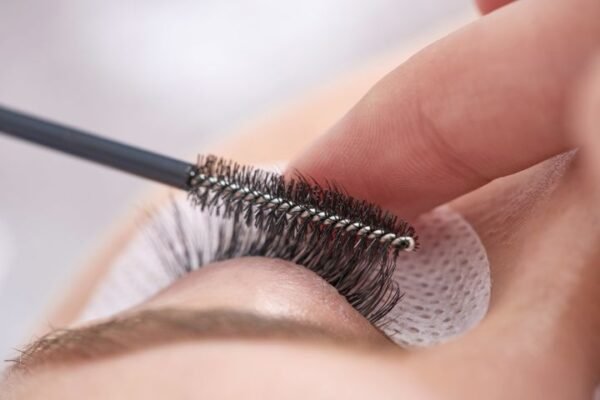
Can You Master the Art of Lash Extensions at Home? Absolutely!

In the beauty world, eyelash extensions have carved out a special niche, transforming eyes from simple to stunning with just a few expert flicks. The answer is a resounding yes for those who have wondered if this salon service can be replicated at home. Embracing the DIY spirit doesn’t just save you a trip to the beauty salon; it empowers you to unleash your inner makeup artist whenever you please. This guide explores how you can achieve professional-looking lash extensions from the comfort of your home, turning a beauty routine into a delightful ritual.
The Allure of DIY Lash Extensions

The journey into home-applied lash extensions begins with understanding their appeal. Imagine enhancing your eyes’ drama and volume anytime you desire without scheduling an appointment or stepping out of your house. The freedom to experiment with various lengths, volumes, and styles at your leisure customizes your look and makes this beauty venture exciting and deeply personal. Whether it’s for a regular workday or a special event, mastering DIY lash extensions means you’re always ready to look your best.
The Best DIY Kits on the Market
Choosing the right diy eyelash extensions kit from brands like Lashify or Lilly Lashes is central to your success with home-applied lashes. These kits have revolutionized the beauty industry by making salon-quality results accessible in your own bathroom. With detailed instructions, high-quality lashes, and safe, effective adhesives, these kits ensure that even beginners can step confidently into the world of lash extensions.
Brands like Lashify have perfected their offerings with innovations like the Gossamer lash, which blends seamlessly with natural lashes, while Lilly Lashes is known for its dramatic flair and celebrity followers. Opting for these kits not only ensures a top-tier aesthetic but also provides the comfort and assurance of using products that are loved by lash enthusiasts worldwide.
Techniques for Perfect Application
Achieving long, luscious lashes at home is all about technique. First, ensuring that your natural lashes are clean and free from oils or makeup residue is crucial. A simple eyelash cleanser or gentle makeup remover will do the trick. Next, pick the lash from the tray using a quality tweezer, dip the base into the adhesive, and gently place it on your natural lash line, not touching the skin. The key is to start from the outer corner and work your way in, allowing each segment to blend smoothly. Patience is your best friend during this process, as rushing can lead to clumps or unevenly spaced lashes. Remember, practice makes perfect; soon, this process will become as natural as applying mascara.
Customizing Your Look
Once you’ve mastered the basic application, the real fun begins with customization. Lash extensions offer the unique ability to tailor your look to match your mood or the occasion. Want a cat-eye effect? Opt for longer lashes towards the outer corners. Prefer a more subtle enhancement? Choose shorter, natural-looking lashes. The versatility of lash extensions lies in your ability to mix and match different lengths and curls, creating a look that’s as unique as you are.
Experimenting with various styles can be as creative as you want it to be, and with each application, you’ll find your technique improving, along with your ability to personalize your lash map.
Maintaining Your Lash Extensions
Proper maintenance extends the life of your lashes and protects your natural lashes. Avoid oil-based products around the eyes as they can loosen the adhesive. When it comes to cleaning, a gentle, oil-free makeup remover and a soft brush will help you keep your lashes perfect. Sleeping on your back also helps prevent premature shedding. With careful maintenance, your DIY lash extensions can look fabulous for weeks, making this beauty treatment glamorous and economical.
Common Mistakes to Avoid
Every new endeavour comes with a learning curve, and DIY lash extensions are no exception. A common mistake beginners make is applying too much adhesive, which can lead to clumpy or unnatural-looking lashes. Another error is not waiting long enough for the glue to become tacky before application, which can cause the lashes to slide and not adhere properly. Avoid these pitfalls by following the instructions meticulously and allowing yourself plenty of time to apply your lashes. Remember, the goal is to enhance your natural beauty, not overwhelm it.
The Pros and Pros of DIY Lash Extensions
Yes, you read that right—it’s all about the pros here! Adopting the DIY approach to lash extensions saves you money and gives you complete control over the materials and styles used. It’s a perfect solution for those with sensitive eyes or allergies who may react to salon-grade adhesives. Mastering this skill can be incredibly satisfying, adding a burst of confidence to your DIY beauty capabilities.
Embracing the Trend

As you step back to admire your work, the benefits of applying lash extensions at home are clear. With a bit of practice, the right tools, and a flair for customization, achieving salon-quality lashes on your own is not just possible; it’s a transformative beauty game-changer. So why wait for a special occasion or appointment availability? Dive into the world of DIY lash extensions, and let your eyes do the talking any day of the week.
Embrace this trend, and soon, the question won’t be whether you can achieve professional lash extensions at home—it’ll be about how many compliments you can handle in a day!


