How to Make a Christmas Wreath (And How Your Air Fryer Might Come in Handy!)
The countdown to Christmas is officially on and we are already beginning to decorate our homes for the festivities. Whilst many tend to buy ready-made decorations, homeowners now more than ever are getting creative and are creating their very own Christmas decorations.
DIY Wreaths have been going viral on TikTok – one video, in particular, has received over 770,000 views and people are wanting to re-create the viral wreath for themselves with one commenting, “I need to try this one”, and another saying, “I love this! Saving to recreate”.
We always enjoy working with Ninja Kitchen and this time their team revealed exactly how you can create your very own Christmas wreaths this festive season.

How to Create the Perfect Homemade Wreath
- Florist’s wire
- A wreath ring
- Sharp scissors
- Wreath filling or moss
- Foliage, dried fruit and other decorative items of your choice
- String or a hook
Once you’ve got everything you need to make your wreath, lay it all out on a table with plenty of space and begin to envision how you’d like your wreath to look.

- Create your shape
If you haven’t bought a pre-formed wire wreath, then you need to ensure your wire is shaped correctly. To do this, carefully cut it to the length and size you desire. You should then wrap the wire around itself multiple times in order to help keep the shape of the wreath nice and firm. Doing this also allows you to create a thicker wreath which will enable you to add more items to it.
- Fill your wreath
Next, you need to fill and bulk out your wreath using your wreath filling of choice (many people use moss). This acts as a mould for the decorative items you’re going to add. Make sure you use florist wire where needed to tie knots around any loose packing and secure it into place.
- Add your foliage
Now you’ve got a strong and sturdy base, you can decorate your wreath and get creative! Start with your autumnal foliage and place it on your wreath, using the moss as your base. If you need to, reach for more florist wire to ensure your foliage stays in place against the moss.
- Decorate your wreath
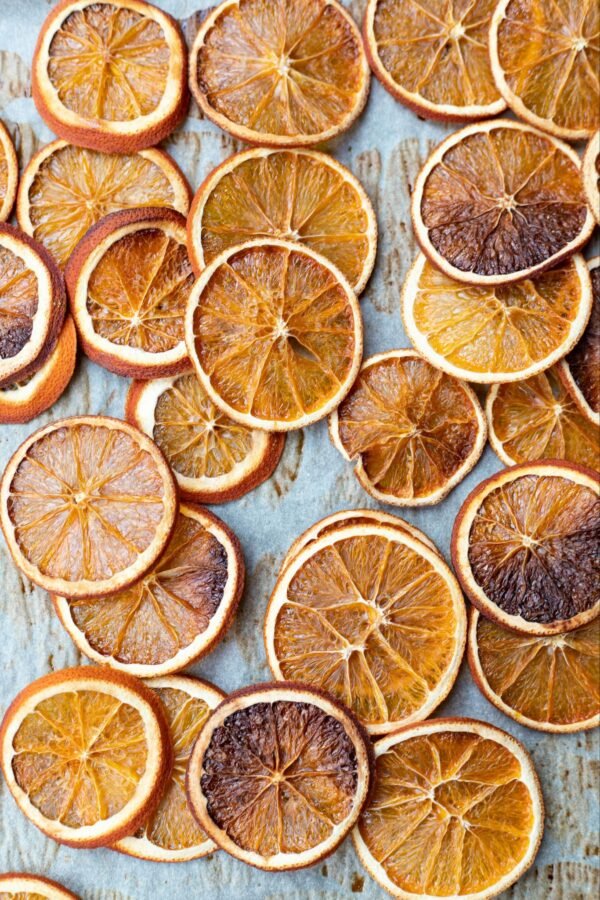
The final step to creating your wreath is to decorate it to your liking. Here is where you can add dehydrated fruits for a warm, inviting look or add other natural items such as pinecones, and acorns. You may find a hot glue gun works best to secure these final pieces onto the wreath.
- Hang your wreath and enjoy!
Using string or a hook, attach to your wreath and hang on your front door.
How to Dehydrate Fruit in Your Air Fryer
With dehydrated fruit being a crucial component of any Christmas wreath or garland and searches for ‘dehydrated fruit recipes’ being up by 90% in the last month, here are some tips on how to dehydrate your fruit using an air fryer this Christmas.
When using fruit as a decoration for your wreaths and garlands you need to make sure they are completely dry and free from any moisture.
You can use the ‘dehydrate’ function on your air fryer to speed up this process – this process can normally take days if waiting for them to dry naturally. You can also use one of our air fryer accessory racks to increase the dehydration capacity.
To use your air fryer dehydration function, follow the below steps:
- Slice fruit
Finely slice your fruit to around 3mm slices to ensure even dehydration. If using apples, rinse them in lemon water to prevent them from going brown. Pat the slices dry.
When it comes to choosing your fruit garnishes, you’re best off picking citrus zesty fruits like orange, lemon, grapefruit and limes as they pack plenty of flavour but not too much juice which can affect its dried texture.
- Place the pieces singularly in your air fryer
Place the fruit slices in a single layer in the drawer to ensure even drying. Then install the crisper plate in the drawer on top of the slices and place another layer of slices on the crisper plate. Set DEHYDRATE, set TEMP to 60°C and TIME for 4 hours.
- Turn the decorations over
When ready, turn and dry the other side for another 1-2 hours then check the fruit to ensure it is sufficiently dried.
For a final step, you can also preserve your pieces for longer using glycerine. Coating your fruit and other natural items will help keep your fruit looking fresher for longer.


