Christmas Dinner Leftovers? Expert Reveals Guide to DIY Baby Food

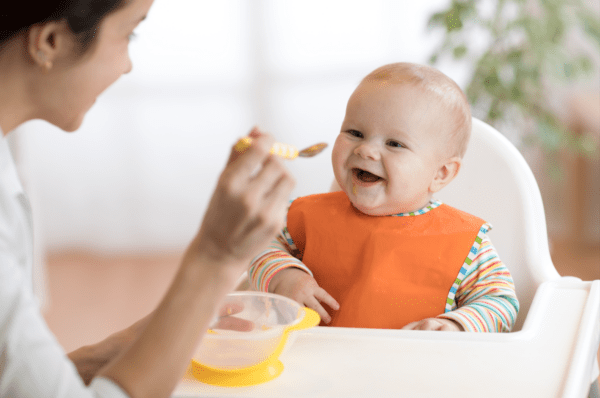
At about six months of age, parents usually start weaning their babies off milk and introducing solid foods to their diet.
At that time, you want to be feeding your baby highly nutritious foods, and there is nothing healthier than homemade baby food.
Nuby explores the best ways to approach DIY baby food – and how to make sure your little one gets all the nutrients while enjoying their food.
The art of DIY baby food
Think about cooking baby food as preparing a clean, simple, and nutritious adult meal. The combination of ingredients is in accordance with the latest health guidelines on macro and micro nutrients, while the most important ingredient remains love. The only difference is that you’re paying extra attention to the texture.
It’s advisable to start with soft textures, such as purees, and slowly introduce lumpier textures and more solid foods by the age of nine months.
Preparing your own baby food has a range of benefits. First, it gives you full control of the ingredients your baby consumes and how the food is prepared. This comes in handy if your baby has certain allergies or if you’re working with a baby nutritionist who is guiding you along the way.
Second, preparing your own baby food can save you money compared to ordering it or buying it in a store.
Before embarking on the weaning journey, there are a few things to keep in mind. Your baby should be able to sit upright and keep its head up. An interest in table food is also a good sign that your little one is ready to change its diet.
DIY baby food: tips & tricks
What should your baby’s first solid food be?
Now that you know that your baby is ready to start eating solid foods, which is the recipe that breaks the milk craze?
A puree is a good option to go for. Start with something simple, such as a sweet potato mixed with milk for a smooth transition, or a smashed banana.
Give your baby a tablespoon or two and let it explore the taste and texture. This will show you weather you should give them some more. It’s important to listen to your baby’s needs and approach weaning slowly and with patience.
Baby cereal is also a great first-time solid food. Oats and barley are great options.
The experimental stage
When you fist start weaning your baby, you will still be feeding them their normal milk. In fact, solid foods will only be a small portion of their diet until they reach about one year of age.
This is your time to allow them to experiment with different tastes and textures to see what they like and how it affects their digestive system. Start with about one to two ounces of food three to four times a day and gradually increase that to six to eight ounces of food three times a day with two snacks in between.
Get the right equipment
In order to prepare the perfect baby food at home, it’s important to have the right equipment. While a simple spoon, fork, or a potato masher would work just fine, a blender or a food processer will make your life much easier. If you wish to be extra fancy, you can invest in a baby food maker designed specifically for that.
You should also have food storage containers, ice cube trays, and freezer bags handy to be able to store your food in order to keep it fresh.
Food containers that you can carry around with you are also an important item to consider. Just like you would bring changing bags and a baby carrier on your walks outside, also bring your baby’s food so that you keep up with their feeding regime.
Clean your workstation
Make sure you wash your hands and your preparation area before you start making baby food. Avoid contamination by washing your hands again after touching raw meat, fish and eggs. The same applies to your utensils. Hygiene is a massive priority when it comes to your baby’s food.
The perfect puree recipes
There are various food combinations you can try when preparing your baby’s puree.
With fruits and vegetables, such as parsnip, beets, leafy greens, sweet peas, parsnips, blueberries, cherries, and pears, wash and peel them before you bake, boil, or steam them. Make sure you remove the skins and then puree them by adding water, breastmilk or any other liquid to the mixture. You can store purees in the fridge for a few days or in the freezer for up to a month.
You can also make purees that don’t involve cooking, such as mashing a ripe banana, avocado, and melon.
Legumes and beans can also be pureed. Just make sure that they’re low-sodium and drained well. Meat and poultry can be cooked in a pan and then ground in a blender. Boneless fish can be steamed for about five minutes and then mashed with a fork, making sure that there are no bones.
One common belief is that baby food is bland and doesn’t taste good. While avoiding seasoning such as salt and sugar is recommended, you can mix and match fruits and vegetables that have a strong natural flavouring to create delicious recipes that your baby and an adult alike would enjoy.
Some great puree combinations include sweet potato and kale, beets and blueberries, pumpkin and white bean, or chicken, carrot and ginger.
Introducing texture
After a few months of eating purees, your baby should be ready to try different textures and chunkier foods. Transition to fork-mashed purees at the start and gradually introduce finger-sized foods, preferably cooked.
With time, you will want to be able to invite your child to the table and share the family meal. If you’re cooking a spicy stew, for example, make sure you reserve a portion for your child before adding the spices. Make an effort to cook easily chewable and digestible meals for the whole family. You will see that your baby will naturally reject foods that aren’t to their liking, such as dry meat.
Transition to baby food is a vital step of your child’s development. It’s important to know how to do it right in order to raise a healthy and happy baby. And don’t forget to have fun while doing it, because instilling a positive relationship with food from an early age is crucial!


